Pages

Friday, October 11, 2013

Day 11: Videographer Verdict

And the verdict is...Expensive.

The cost of a videographer was not something I was prepared for. I thought maybe $500 tops for someone for the whole night. Boy was I wrong.

I remember walking though the bridal fair with my now husband, checking out all of the vendors when we stumbled upon the videographer I was thinking about hiring. I chatted with him, then began to pursue his brochure.
$1000 for JUST the ceremony? Yea...I was not expecting that.
I was bummed. I was sure that we weren't going to be able to have a video of our wedding.
Then, while surfing Pinterest, I came across a company called Wedit.

This company sends you 5 HD video cameras a few days before your wedding, you hand them out to people you love and trust, send them back, and they upload all of the footage from your cameras. And... it only cost $400.
That was doable.

We ended up handing ours put to a couple family members and the family of some of our groomsmen. It was so worth it!

When I got the email from Wedit saying our footage was uploaded I was so excited! I immediately logged on and began looking. There was so much! It was a little overwhelming.

Editing is not included in the Wedit prices. However, if you have access to fairly simple editing software, you should have no problem editing. They do offer editing services for extra, although it kind of pricey. $350 for ALL clips edited into a nice video with music as well as a 3-5 minute highlights video. Or you can get the highlight video my itself for $199.
I have been so overwhelmed with school, work, and family life that we decided to go ahead and use some of our wedding gift money to get the large edited package.
I got all of our edited videos yesterday and am IN LOVE. They seriously did such a great job editing, it was worth every penny.
Here is our highlight video from Wedit.


This is day 11 of a 31 day series

Thursday, October 10, 2013

Toddler Friendly Halloween Craft: Foam Bats

      Foam Bats


Taking a little break from my 31 days wedding series for a little Halloween spirit. I just want to say that I had an absolute blast making these with my daughter! They were so much fun to make, and pretty simple too.
 
The night before we made the bats, I went ahead and  got everything ready. First things first.


I started with foam balls like these (Hobby Lobby). I painted the foam balls black. I used plain acrylic paint. It would probably be easier to spray paint them, but I didn't have any black spray paint on hand.
 
 
Then I took a few sheets of this glittery black foam and cut out 12 sets of wings.


I just looked at a picture of bat wings and free-handed an outline on the back of the foam with a pencil.


The next day was production day! My daughter was super excited if you couldn't tell.


    I hot glued the wings to the foam balls. Any of the glue that still showed up, I just painted with my acrylic paint. To glue the wings down, I put a strip of glue along the inner part of the back of the wing. Then I just laid it flat on the front of the foam ball body, leaving enough space between the wings to add eyeballs.
After all foam bat bodies had wings, I dug out the googly eyes. I got these glow-in-the dark ones from Hobby Lobby. I let my daughter pick out the eyeballs for each bat. I put a tiny bit of hot glue on the body of the bat, and let her put the eyeball in place. She really enjoyed helping and giving the bats their faces.


The last step to get the bats ready to hang up was attaching a tie to the top. I poked a small hole in the top of the bat. Then I took some plastic string I found at Hobby Lobby and folded it in half. I hot glued the string so that both ends were hanging out at the top.


I decided that I wanted to hang them along our pathway to our front door. Luckily we have a tree that is in line with a hook in our entryway. I took the same plastic string and tied a long piece from the tree to the house. Then I took each bat and tied them individually to the long string between the house and tree.


I've linked up this post to the Trick or Treat Thursday link up party! Check out the other awesome posts!
 
 
                                                            Trick or Treat Thursday

Day 10: Pretty Program (and its reuseable!)

 
This was our wedding program. A simple chalkboard.
 
Let's be honest, every paper program I have ever taken home from an event has ended up in the trash can. After researching how much programs can actually cost, I felt bad for literally throwing away other peoples money, and didn't not want to let other people throw away my money.
 
I had been looking at chalkboards for my daughters room, when I came across this on Etsy. It was $80 and I personally could not bring myself spend the money on it. I really hate spending money.
 
Then, in another Pinterest session, I found this pin:


I would not feel bad about buying the chalkboard for my daughters room if I could get another use out of it. I immediately bought the chalkboard.
 
When it came in, I played around with it. I used chalk at first, but found it was super easy to wipe off. Then I used chalkboard markers. They were really difficult to use and tended to bleed.
I found these in Target. Chalkboard/Dry Erase crayons.


They were super easy to use and couldn't just be wiped off! Perfect!
 
 A couple of weeks before my wedding, I was counting my lucky stars that I bought this instead of paper programs. If there is one thing I learned from wedding planning, that is that nothing is set in stone.
We got a call from one of groomsmen saying that he wasn't going to make it to the wedding. He is in the army and couldn't get his leave request approved. We were able to get a replacement fast, but we wouldn't have been able to get new programs printed in time. With the chalkboard, I simply had to get a wet paper towel, wipe off the name and change it.
 
One way to save money, is to find things that can be used for more than one purpose. This was definitely true with this chalkboard program.
 
This is day 10 of a 31 day series. To see the rest, click here!
 
You can also find me on Facebook!


Wednesday, October 9, 2013

Day 9: Guestbook...Priceless.

... No really, it was free!


I've only got one word to say....Shutterfly.
 
Seriously... Remember all of those coupons I was talking about in my stationary post? Well every few months or so, they have a "Free Photobook" coupon. Being a Shutterfly fanatic, I of course knew about this and waited until they were offering it to get our guestbook. I absolutely love it. Its something that we actually enjoy looking at too, which is even better!!
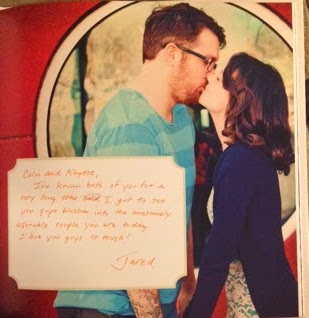
Here a few of our pages :)

Plenty of room for everyone to sign!


And adorable pages with inset boxes for your friends and family to sign.


This is day 9 of a 31 day challenge. To see the rest, click here.

You can also find me on Facebook!


Tuesday, October 8, 2013

Day 8: DIY Project: Card Box


This is one of the projects I was most proud of. I spent a lot of time this card box with a simple box from Hobby Lobby ($6 after 40% coupon)


I spray painted it with Rustoleum paint. I got this at Lowe's for $3, I believe and used it for multiple wedding projects. I covered all of the metal hinges, buttons, and handle with masking tape before I painted.


The last step was the most time consuming. I picked out scrap paper from this scrap paper book. I ordered about 6 of these books and used them or other wedding decorations too. Using the materials in more than one project helped tie everything together.


I took my Exacto knife and cut the paper to fit every inch of the inside of the box.
Then I glued them down.
After it was dry, I brushed Modge Podge.


I also took other pieces of scrap paper and cut them into bunting flags. I cut a slightly smaller piece of black construction paper, and wrote "CARDS" in white dry erase crayon. 


I then glued the construction paper to the scrap book paper, and the scrap book paper to a piece of yarn. I hot glued the yarn to the box to look like a banner.
 

This is day 8 of a 31 day series. To see the rest, click here.
 
You can also find me on Facebook!
 

Monday, October 7, 2013

Day 7: Saving Money on Stationary: Save-the-Dates, Invitations, and Thank Yous

I have been a Shutterfly addict since I found out about the site. I love the quality and the prices are really reasonable too. The thing I love most about Shutterfly is their promotions. I love taking advantage of their super cheap prints as well as their other deals.
The best piece of advice I can give is to stock up on Shutterfly coupons, credits, etc. They always have some sort of deal, and 99% of the time they send new coupons in with your order.

When we were looking to order our Save-the-Dates, I happened to have received a 10 free cards promotion. It may not seem like much, but it did save some money, and they were exactly what we wanted.
When I was looking for layouts, I anted the most simple, yet most customizable card I could find. I came across this and fell in love. We ordered 100. We paid for 90 because of the 10 free card promotions. I was also able to use an old credit I had on my account for $25.
The total for our Save-the-Dates was about $70. This may seem like a lot, but it definitely paid off later.


For our invitations we didn't choose to go the Shutterfly route. What I wanted was too specific, and it was not possible with their layouts. I instead turned to Etsy.  I came across a store called Boots and Burlap. All of her designs were super cute and completely customizable. I told her what I wanted, she designed it and sent my PDFs for $10.

I shopped around for print prices. From what I found, Office Max was the cheapest. However, I was lucky, and was able to print all of the invitations at one of my bridesmaids offices. It saved a ton of money, and were very high quality.

One tip I would give, would be to not print invitations at home. In my experience, home printers go through ink really fast and do not produce the best quality. There are a lot of places, such as colleges, office supply stores, etc., that will print things for fairly inexpensive. If you have access to a professional quality printer, use it (just make sure its ok with your boss first)! You can have professional quality invitations for less!

I also ordered pocket sleeves for our invitations. I ordered these from Cards and Pockets.
Their Signature Pocket sleeves only cost $0.63 each and their corresponding envelopes were $0.23 each.


Lastly, you have to send Thank You cards. I have not had the time to fill out and send them yet, but I did get them ordered and just got them in.
Our save-the dates came with a 40% of coupon. Since I did not use Shutterfly for out wedding invitations, I decided to use this coupon for our thank you cards. I ended up spending $30 for all of them.

So the final word is... when looking for stationary, look for deals an discounts. There are tons of card making sites, and you can almost always find some kind of coupon for them. With coupons you can get exactly what you want for less.
Also, like always, shop around. I looked at multiple pocket fold websites before I found Cards and Pockets. I'm so glad that I didn't give up because the other sites charged twice what I paid.


This is day 7 of a 31 day series. To see the rest, click here.
 
 
You can also find me on Facebook!

Sunday, October 6, 2013

Day 6: Helping Hands

When I started planning my wedding, I was determined to do everything. I was too proud...ok... too picky and detail oriented to ask people for help. I had so many people offering help, but refused everytime.

Eventually I came to my senses and started allowing, even asking, for people's help. It was one of the smartest decisions I have ever made wedding planning-wise.

I have so many amazingly talented friends and family members. I was lucky enough that they were willing and excited to help with my wedding! It not only cut down time, but saved me a lot of money too.


One of the major details of a wedding is the wedding cake. Wedding cakes can run anywhere from $3-$15 dollars PER WEDDING GUEST.  For us that was $360-$1800 for our 120 guests. Cue jaw drop. There was no way I was paying that. I would just make cupcakes if I had too! Luckily, I didn't have to.
My aunt and cousin are amazing. They ended up making our wedding cake. It turned out so much better than I ever could imagine, and only cost us about $150.
If you have someone who is willing and able to make your wedding cake at cost, buy everything as cheap as you can.
I bought all of the fondant, gum paste, etc at Hobby Lobby. I downloaded the app and made multiple transactions so I could get everything 40% off. It saved a chunk of money.


Another place to recruit your friends and save money is makeup, hair, and nails.  These have all become an important part of every brides big day. I started calling around and pricing these services for my girls and I. The average cost I found was $55 for hair, $25 makeup, and $35 nails per person. That is $115 per person. Not only could I not afford that, but I didn't want my girls to have to spend that kind of money either.  Not only that, everyone I called was already booked for my wedding day. So... I started asking around. Luckily, if I haven't mentioned it before, I have wonderful friends.
 
 
 These lovely ladies are two of my best friends. They did my hair, make up and nails. Not only did they do an amazing job, but they did it as a gift. They are both such amazing people and I love them so much! They even helped out with the bridesmaids make up! 


When I told my bridesmaids that I had no one to do hair, they immediately decided to get together and do each others hair. We had a hair party at one of the girls houses and spent a good chunk of a night Pinteresting, YouTubing and practicing hair. The girls found super easy, and super cute hairstyles they could do on each other. They all looked stunning and didn't have to spend a fortune!


A major theme in this series is saving money.  But I also want to hit on tips I wish I would have known before planning my wedding.
I asked for help way too late. Instead of being stubborn and thinking I could do everything on my own, I should have welcomed help with open arms. I was so stressed about the wedding, I made myself sick on multiple occasions. I was constantly worried about how I was going to get things done. I can not tell you how much I wish I could go back, have the same wedding, but have more help from the get go.
 
If you have loved ones who have skills that will be beneficial for your wedding, as them for help. The worst thing that could happen is they say no. Your friends and family love you and would feel honored to help out with whatever they can.
 
I hope you all are smarter than I am, and welcome all of the helping hands you have in your life.
 
 
This is day 6 of a 31 day series. To see the rest, click here.
 
 
You can also find me on Facebook!


Saturday, October 5, 2013

Day 5: Frugal Favors

 Like many of my other wedding inspirations, I found this while looking through the wedding section of Pinterest. This is what I found:
 
                                       
A cookies and  milk toast for kids. I LOVED this idea. However, I wanted to take it another step further.
This is when my husband and I talked about having a cookies and milk bar. I knew several people who had candy bars at their wedding and loved the idea of something sweet. However, candy bars seemed so overdone, that cookies seemed perfect!
I will now disclose every detail of planning, prepping, and the final details of our cookies and milk bar.
 
Milk Bottles
 
Also in my Pinterest journey, I came across this pin.


The Starbucks bottles were perfect! They looked like old fashioned milk bottles. I can not tell you how happy I would be if I never had to drink another bottled Frappuccino again. We bought a case a week. My boss bought cases for everyone at work to drink. We gave people cases of them to drink.  There were Starbucks bottles everywhere.
The first thing I did with the bottles was soak them in soapy water fro about an hour. This made the labels peel right off. Then I stuck them in the dishwasher.
After the had been washed once, I used acetone to remove the leftover adhesive residue, as well as the date stamps on the side and bottom of the bottle.
Then I stuck them in the dishwasher again.
 
Lastly, I (actually two of my very good friends) spray painted the lids teal. They turned out awesome!

Cookies:


After finalizing my guest list, I realized I needed about 300 cookies. I kind of had a slight panic attack trying to figure out how I was going to bake 300 cookies the week before I was getting married. My husband mentioned just buying cookies. I thought that was cheating....and tacky.
So..... I enlisted all of the help I could get. Mom, bridesmaids, friends staying at our house, the best man's mom and sister-in-law. Everyone helped bake cookies. There were so many kinds and they were all so delicious!


Little Details:
I ended up ordering the multicolor paper bags off of Amazon for $3 a bag. Each bag came with 12 bags. I loved the colors and they fit perfectly with the color theme of the wedding. I made the sign.. I will go into detail on those later in this series.
I also got the square vases for the bags to go in from Amazon. They were $26 for two of them. I wrapped them in yarn like everything else at our reception.
We put the milk in tin buckets we got from Target. They were so cute. We just stuck them in and filled it up with ice.


This is day 5 of a 31 day series. To see the rest, click here
 
 
You can also find me on Facebook!
.

Friday, October 4, 2013

Day 4: DIY project: Centerpieces


These were our centerpieces.
As I mentioned in an earlier post, got this idea from another wedding I found on Pinterest. You can fin that wedding here.

Paying someone to make centerpieces is ridiculously expensive. I found that this is definitely one of the MUSTS for a DIY list. I have come up with a few pieces of advice for saving money and DIYing centerpieces without stressing, and I will show you what I did for my wedding.

Lets go over advice first.

1. Start looking early. You may notice that this is a theme for this series. I found that doing things early not only cut stress in half, but I was able to shop around and find deals on all of the materials I needed.

2. Pick materials that are inexpensive. If you have a decent size wedding, you are going to find that you are probably going to have to make more than a few centerpieces. If I have learned anything from my dabbles into the crafting world, the cost of materials can add up quickly. For my wedding I chose cheap vases, yarn , mason jars, floating candles, and wine bottles.  I asked on Facebook for any of our wino friends to save their empty wine bottles and we already had mason jars. Your wedding is a great time to repurpose things you have laying around your house and make them beautiful again, and it saves you a lot of money if you do so.

3. Get help. I did a lot of the decorations myself when I was up at night watching Dexter with my husband. However, my bridesmaids came over multiple times to help out with the centerpieces, and I am so glad they did. Not only was it nice having company, but it went faster and there were more brains to figure out the problems that popped up along the way.

4. Work diligently and don't put these off! I had so much going on the week before the wedding, there is no way I would have been able to make centerpieces.

Easy and Inexpensive DIY Centerpiece:
These centerpieces were seriously so easy. Like....stupid easy, and they looked amazing! I really loved the look of mismatched bottles. I felt like it gave the wedding a simple, chic feel, which was perfect because my husband and I are not formal-wedding-type people at all. I used mason jars, wine bottles, and simple cylinder vases.

Materials:
7 1/2 inch vases - $1 from Dollar Tree
Mason Jars -I had them, but you can get 12 at Target for $10
Wine bottles- Ours were donated from friends
Yarn- I ordered in bulk and on clearance online from
Floating candles- 25 for $13 on Amazon

Vases:
The vases were the simplest of the three.


The first thing I did was tie the yarn in a knot towards the bottom of the vase. I made sure to leave extra.


 Then I started wrapping. I didn't diligently wrap the yarn. I wrapped it as fast as I could, then I pushed all of the yarn towards the bottom of the vase. This gave it the tightly wrapped look in no time.


After I had it tightly wrapped as high as I wanted it, I messily wrapped the yarn in a second layer going back down the vase.

When I got to the bottom, I used the extra yarn from the original knot, to tie a know and secure the yarn. And Voila! A wrapped vase.


Mason Jars:

I followed the exact same steps as I did the vases. However, because of the shape of the mason jars, I started the yarn higher, and ended lower than the vase.  This worked out perfect with the floating candles I put in them.


Wine Bottles:


And then there were the wine bottles... Oh my... I was so mad at myself the first night my maid of honor and I tried wrapping these suckers. They were such a pain in the butt! But, we finally found what worked, and I was super happy with the end result.
     

First I tied the knot like I did with the vases and mason jars.
I wrapped the bottle the same way I did the vases and mason jars as well, up until the neck started getting smaller.
This is where we found most of our problems. After experimenting with different methods, we found that brushing on some Modge Podge was the solution. We brushed it on and let it get a little tacky before wrapping the yarn over it.

We wrapped slowly and purposefully, making sure to lay the yarn flush against the yarn below it.

After the bottle was completely wrapped, I let it dry all of the way and messily wrapped the yarn back down the bottle. This gave it the look of multiple layers and allowed for us to tie off the yarn with the original knot, same as with the vases and mason jars.


This is day 4 of a 31 day series. To see the rest, click here!


You can also find me on Facebook!